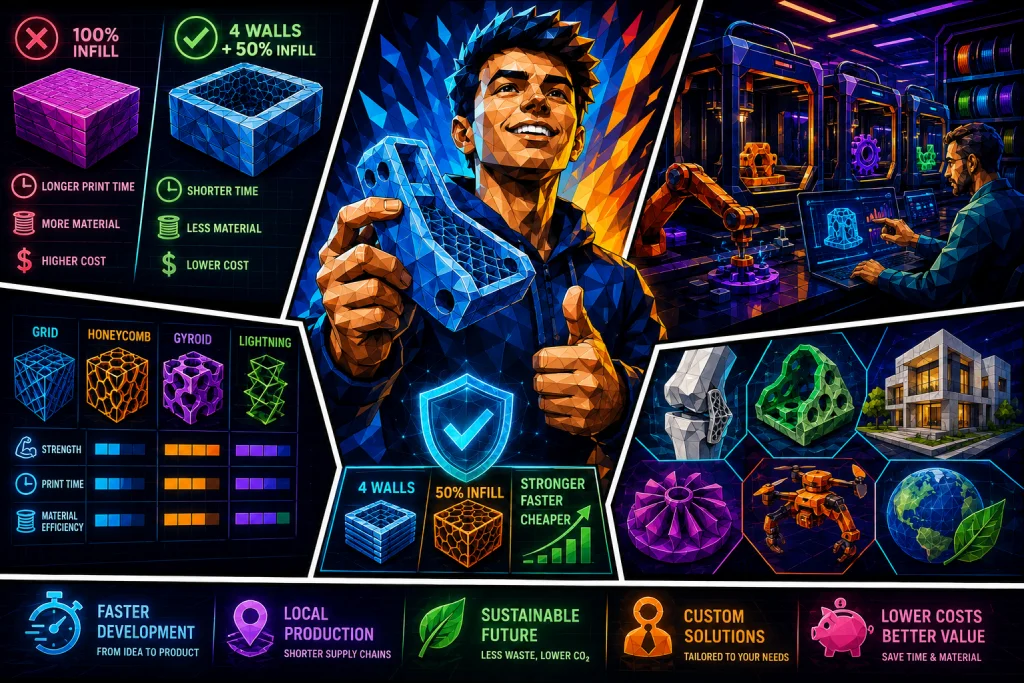
Optimise your items by understanding the balance between wall thickness, patterns, and production time
When working professionally with FDM technology, you often face the choice of infill in your slicer software. The decision is about more than just saving material. It is a strategic trade-off between mechanical strength, 3D print time, and the total production costs. Many users automatically overestimate the need for high density, resulting in productions that are both more expensive and slower than necessary. This article reviews the technical aspects of infill so you can make data-driven decisions for your next production.
What is infill and why is it important for your 3D print?
Infill constitutes the internal structure of your 3D print, which is normally not visible from the outside. To understand the function, you can compare the item to the human body. The outer shells, or perimeters, function like the skin that holds the structure together and protects against external forces. Infill functions like the skeleton that maintains the shape and prevents the model from collapsing.
The 3D print itself is built from this combination. Without infill, the horizontal top layers would collapse during the 3D print process, as the plastic cannot float in the air. In addition to supporting the geometry during production, infill contributes to the item’s overall stiffness and resistance to pressure. However, it is a common misunderstanding that one must approach 100% solid infill to achieve strong parts. A solid infill often provides only a marginal strength increase compared to 50-80%, but it almost doubles your 3D print time and material consumption.
[Calculate your 3D print price]
How do you choose the right infill percentage?
The choice of percentage should always be dictated by the item’s end use. For visual models, prototypes, and figures that are not subjected to physical stress, the purpose of infill is solely to hold up the top layers. Here, the ideal level typically lies between 0 and 20%. A setting of 15% often hits the best balance between a neat surface quality and a fast production time.
For functional parts, such as brackets, boxes, and everyday objects, more substance is required. A level of 20-50% provides ample strength for most household articles and light industrial items. Even simpler machines can produce fully usable functional parts at these lower percentages, as long as you do not subject them to extreme stress. You rarely need to over-dimension your prints to make them functional.
When you move into the 50-100% range, we are talking about high stress. This is relevant for industrial parts, gears, or tools exposed to large forces. However, you should be aware of the law of diminishing returns. The gain in strength when going from 80% to 100% is often minimal, while the costs increase significantly. Furthermore, 100% infill does not necessarily make your 3D print indestructible. Even if the item becomes solid, you still risk layer delamination under stress. For maximum strength, you should focus on material choices like PETG or nylon and correct temperature control rather than simply maximising density.
Which infill pattern provides the greatest strength?
The pattern plays just as large a role for the item’s properties as the percentage itself. Tests of 3D printed hooks show clear differences in both breaking strength and time consumption depending on the geometry.
The most common pattern, grid or rectilinear, is fast to print. In controlled tests, this pattern handled a load of 48 kg and was fastest to finish in approx. 48 minutes. The weakness of this pattern is that it prints in the same direction layer upon layer, which can create vertical weak points in the structure.
If you are looking for the best balance between strength and material consumption, honeycomb is often the winner in terms of economic efficiency. It handled 57 kg in the same test setup. The disadvantage is time; your 3D printer must make many direction changes, which increases the 3D print time considerably, especially when you exceed 50% density.
Another strong alternative is the triangular pattern, which handled the highest load of 60 kg. It should be noted, however, that this pattern used significantly more material than set – effectively 45% density at a 30% setting – which makes it strong, but heavy and expensive.
In industry, the gyroid pattern is gaining ground. It waves in all three dimensions, providing isotropic strength. This means the item is almost equally strong regardless of the angle from which it is loaded. A major advantage of gyroid is that the print head never crosses its own path, which reduces vibrations and the risk of failure at high speed.
At the opposite end of the scale, we find lightning infill. This pattern is designed specifically to save material and has no mechanical strength. It only builds structure exactly where it is necessary to support internal overhangs and the top, leaving the rest of the model hollow. It is the optimal solution for purely visual models where economy is weighted higher than strength.
How does the number of walls affect strength versus infill?
Many overlook the fact that wall thickness, or the number of perimeters, almost always contributes more to strength than increased infill. When your 3D printer draws walls, it lays the plastic paths precisely next to each other along the same route. This creates a large contact area and a strong fusion. Infill, on the other hand, only touches the outer shell at small points, resulting in a weaker bond.
Technical tests show that an item printed with 6 walls and only 15% infill is just as strong as an item with 2 walls and 100% infill. This is a significant difference that underlines the importance of the shells. You should therefore ensure at least 3-4 walls, which corresponds to approx. 1.2 – 1.6 mm with a standard 0.4 mm nozzle, before you start turning up your infill percentage. A solid rule of thumb for strong, functional parts is to use 4 walls combined with 50% infill.
How does the type of load affect your choice of infill?
When designing, you should consider how your item will be loaded in reality. According to beam theory, a specific distribution of forces occurs when you bend an object. The outside is stretched, and the inside is compressed, while the core of the item experiences almost no load. This is similar to bending a piece of foam with tape on both sides; the tape, representing the walls, takes the entire pull.
If your item must resist bending, you should place the material as far out towards the surface as possible by increasing the number of walls. If the item, on the other hand, must resist direct pressure, infill plays a larger role in preventing the walls from buckling inwards. Also, be aware of the difference between stiffness and durability. More walls increase stiffness but also make the item less flexible, which in some cases can cause it to break under sudden impacts where an item with less wall thickness would have absorbed the energy.
Does your 3D printer type matter for the choice of infill?
The machine’s speed and cooling capacity have a direct influence on the price when choosing high infill. On entry-level machines that print slowly and often lack dedicated part cooling, the price for high density becomes extreme. A standard test Benchy can take over 1.5 hours here. If you choose high infill on a slow machine, you pay dearly in production time. Lack of cooling also means the machine struggles with bridges, forcing you to use higher infill to support internal structures.
If you use a high-end machine instead, the calculation looks different. With a significantly shorter print time and excellent cooling, you have more freedom. The fast 3D printer makes the time penalty of high infill less noticeable. The precise control of walls on newer machines also ensures that you get full strength utilisation of your perimeters through better layer bonding.
What does infill mean for the price of your 3D print?
The price of a 3D print depends directly on machine time and material consumption. When you increase infill, both parameters rise, but often the time increases faster than the material price. A theoretical example for a 10 cm cube printed in PLA shows the difference. At 20% infill, the print takes approx. 4 hours and costs approx. 235.00 INR in material. If this is increased to 80% infill, the time can rise to 10-12 hours, while the material price ends at approx. 800.00 INR.
The difference becomes especially clear when you choose patterns over 50% density. Here, complex patterns like honeycomb start to take significantly longer than simple patterns, even though the strength difference is minimal. For companies calculating total cost of ownership, optimising infill constitutes one of the most effective methods for reducing the production price.
An advanced method to optimise the price is the use of variable infill or modifiers in your slicer. Most modern programs allow you to differentiate the density within the item. You can, for example, place 10% infill at the bottom of the model and increase to 50% around a screw hole where the load is greatest. This technique ensures strength exactly where it is needed without wasting material and time on the rest of the item.
Overview of recommended settings
The table below summarises our recommendations for the composition of walls, pattern, and density based on the intended use.
| Application | Recommended Infill % | Walls (Perimeters) | Recommended Pattern |
| Visual / Display | 10-15% | 2 | Lightning / Grid |
| Standard Functional | 20-30% | 3 | Grid / Cubic |
| Flexible (TPU) | 10-40% | 2-3 | Gyroid |
| High Strength | 40-60% | 4+ | Gyroid / Honeycomb |
| Watertight | 100% | 4+ | Rectilinear |
Is 100% infill always the strongest choice?
No, 100% infill is rarely the most effective solution technically. Although the item becomes solid, it provides only marginally more strength than 50-60%, but increases your 3D print time and cost significantly. Strength is better achieved by increasing the number of outer shells, as these bear the majority of the load during bending and tension.
Which infill pattern is strongest?
Gyroid and Honeycomb are generally the strongest patterns for functional parts. Gyroid offers isotropic strength, making the item equally strong in all directions, while Honeycomb is very efficient in relation to weight. For simple tasks, Grid is fastest, but it lacks the same resistance to complex loads as the more advanced geometric patterns.
What is the standard infill percentage for ordinary 3D prints?
A standard infill of 15-20% is appropriate for most visual models and light utility items. This level ensures that the top layers are supported correctly during the printing process without using unnecessary material. If the item must withstand light everyday use, we recommend increasing the density to 20-30% to ensure slightly better general durability.
How many walls should I use for strong parts?
We recommend a minimum of 3-4 walls, which corresponds to approx. 1.2-1.6 mm, for all functional parts. Tests show that an item with 6 walls and low infill is often stronger than an item with few walls and high infill. The walls create an unbroken structure that resists tension and bending far better than the internal filling.
Does infill affect the price of my 3D print?
Yes, higher infill increases both material consumption and especially your 3D print time significantly. Since machine time is often the most expensive factor in professional 3D print, an increase from 20% to 80% will often triple the price of the item. It is therefore economically advantageous to keep infill as low as possible without compromising function.
How do I make my 3D print watertight with infill?
To make an item watertight, you should choose 100% infill or significantly more walls to avoid microscopic holes. The Rectilinear pattern is often best for this purpose, as it lays the layers densely and consistently. Remember, however, that material choice and high temperature are also crucial for sealing the layers completely against liquid.
Get more out of your production with smarter settings
The choice of infill is not a static setting, but a tool to fine-tune your production. By understanding the interaction between wall thickness, patterns, and machine speed, you can reduce your costs significantly without compromising on quality. Always start by assessing the load, increase the number of walls before increasing the density, and choose the pattern that best fits the task. If you need guidance on optimising your 3D print production, or are in doubt about material choice for a specific project, our team at our facility is ready to help you move forward with the right solution.